
loom knitting instructions for beginners pdf
Loom Knitting for Beginners⁚ A Comprehensive Guide
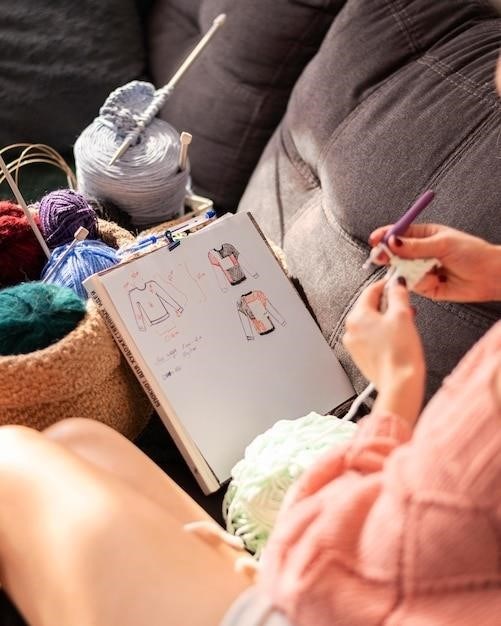
Loom knitting is a relaxing and fun craft to learn. You can loom almost anywhere, and you can make almost anything! Each of the links below will open a printable PDF to assist you in learning to loom knit! Loom Size and Gauge Chart Use this chart to see how looms measure against each other in each gauge.
Introduction to Loom Knitting
Loom knitting is a fun and easy way to create knitted items without using traditional knitting needles. It’s a great craft for beginners because it requires less dexterity and is less prone to dropped stitches. Loom knitting involves using a loom, which is a tool with pegs that hold the yarn and create the stitches. There are many different types of looms available, from small circular looms for making hats and scarves to larger rectangular looms for making blankets and afghans. Loom knitting offers a more accessible and less intimidating approach to knitting, allowing anyone to enjoy the joy of creating beautiful knitted projects.
Types of Looms
Looms come in various shapes and sizes, each suited for different projects. The most common types include⁚
- Circular Looms⁚ These are round looms with pegs arranged in a circle. They are ideal for creating tubes, such as hats, scarves, and sleeves.
- Rectangular Looms⁚ These looms have pegs arranged in rows, making them perfect for knitting flat pieces like blankets, scarves, and placemats.
- Knitting Boards⁚ These are flat boards with holes or pegs that hold the yarn. They are used for making flat knitted items like scarves, blankets, and even small toys.
- Finger Looms⁚ These are small looms that you can hold in your hand. They are perfect for learning basic stitches and making small projects like coasters or keychains.
The choice of loom depends on the project you want to create and your personal preference.
Choosing the Right Loom and Yarn
Selecting the appropriate loom and yarn is crucial for successful loom knitting. Here’s what to consider⁚
- Loom Size⁚ The size of the loom determines the size of your finished project. A smaller loom creates a smaller item, while a larger loom results in a larger item. Consider the size of the project you want to make when choosing a loom.
- Yarn Weight⁚ The weight of the yarn affects the gauge of your knitting. Bulky yarn will create a thicker fabric, while thinner yarn will create a finer fabric. The loom size should match the yarn weight for best results.
- Yarn Fiber⁚ Choose a yarn that is appropriate for the project you’re making. For example, wool is a good choice for warm clothing, while cotton is more suitable for summer projects.
- Yarn Color⁚ This is a matter of personal preference. Choose a color that you like and that complements your project.
Experiment with different looms and yarns to find what works best for you.
Basic Loom Knitting Stitches
Mastering the fundamental stitches in loom knitting is essential for creating a wide range of projects. Here are two basic stitches that form the foundation of loom knitting⁚
- The Knit Stitch⁚ The knit stitch creates a smooth, stretchy fabric. To create a knit stitch, wrap the yarn around the peg and use the loom hook to pull the bottom loop over the top loop. This creates a new loop on the peg, and the process is repeated across the loom until the desired length is reached.
- The Purl Stitch⁚ The purl stitch creates a textured, less stretchy fabric. To create a purl stitch, lay the working yarn under the loop on the peg and use the hook to pull the loop over the yarn. This creates a new loop on the peg, and the process is repeated across the loom.
By combining these two basic stitches, you can create a variety of patterns and textures.
The Knit Stitch
The knit stitch is the most basic stitch in loom knitting. It creates a smooth, stretchy fabric that is perfect for scarves, hats, and other garments. Here’s how to create a knit stitch⁚
- Wrap the Yarn⁚ Wrap the working yarn (the yarn coming from the ball) around the peg, moving in a clockwise direction.
- Pull the Loop⁚ Using the loom hook, pull the bottom loop over the top loop, creating a new loop on the peg.
- Repeat⁚ Repeat steps 1 and 2 for each peg on the loom, working your way across the row.
The knit stitch is easy to master and can be used to create a variety of patterns and textures when combined with the purl stitch.
The Purl Stitch
The purl stitch is the second basic stitch in loom knitting, and it creates a slightly bumpy, textured fabric. It’s often used in combination with the knit stitch to create interesting patterns.
- Start with the Loop⁚ Begin with the loop at the top of the peg. Lay the working yarn under the loop and across the front of the peg.
- Hook Under⁚ Using your loom hook, place the point under the top loop and over the working yarn.
- Pull Through⁚ Pull the loop through the working yarn, creating a new loop on the peg.
- Repeat⁚ Repeat steps 1-3 for each peg on the loom, working your way across the row.
The purl stitch, when combined with the knit stitch, allows you to create a wide range of textures and patterns.
Casting On
Casting on is the process of getting your stitches onto the loom to begin your project. It’s like creating the foundation for your knitted piece. There are several methods for casting on, each with its own advantages and disadvantages. Here are two popular methods⁚
- E-Wrap Cast On⁚ This is a simple and common method. Wrap the yarn around each peg in a clockwise direction, creating two loops on each peg. Then, using your loom hook, lift the bottom loop over the top loop on each peg, leaving one loop per peg.
- Double E-Wrap Cast On⁚ This method creates a more secure and less stretchy edge. Wrap the yarn around each peg twice in a clockwise direction. Then, lift the bottom loop over the top loop on each peg, leaving one loop per peg.
The chosen method will depend on the project and personal preference. Practice both methods to find the one you feel most comfortable with.
Working Rows
Once you’ve cast on your stitches, you’re ready to start knitting rows. This is where the magic of loom knitting happens. You’ll be working back and forth across the loom, creating the fabric of your project.
Here’s a breakdown of how to work a row⁚
- Start with the working yarn⁚ Make sure the yarn is coming from the ball and is positioned near the first peg.
- Knit the stitch⁚ Wrap the yarn around the peg in a clockwise direction, creating a new loop. Use your loom hook to lift the bottom loop over the top loop, leaving one loop on the peg. Repeat this process for each peg on the loom.
- Turn the loom⁚ Turn the loom around so the other side is facing you. This will prepare you to knit the next row.
- Repeat steps 2 and 3⁚ Continue knitting rows until you reach the desired length of your project.
Don’t worry if it seems a bit tricky at first. With practice, you’ll quickly get the hang of it! Remember to keep your yarn tension consistent for a smooth, even fabric.
Binding Off
Binding off is the final step in loom knitting, and it’s what secures your stitches and prevents them from unraveling. It’s a bit like casting off in traditional knitting, but with a loom, it’s even easier.
Here’s how to bind off⁚
- Wrap the yarn⁚ Wrap the yarn around the loom in a figure-of-eight pattern, going from one peg to the next. Make sure you’re wrapping the yarn in the same direction as you were knitting.
- Remove a loop⁚ Using your loom hook, lift the bottom loop on the first peg over the top loop, removing one loop from the peg.
- Repeat⁚ Repeat this process for each peg on the loom, lifting the bottom loop over the top loop until there’s only one loop left on each peg.
- Secure the last loop⁚ Cut the yarn, leaving a tail long enough to tie a knot. Thread the tail through the last loop on the loom and pull it tight.
You’ve now successfully bound off your loom knitting project! Cut off any excess yarn and admire your handiwork.
Simple Loom Knitting Projects for Beginners
Once you’ve mastered the basic stitches and techniques, it’s time to try some simple projects. These projects are great for practicing your skills and building confidence. You’ll find that loom knitting is a fun and rewarding craft, and you’ll be amazed at what you can create! Here are a few ideas for beginner-friendly projects⁚
- Loom Knit Scarf⁚ Scarves are a classic beginner project. They’re easy to make, and you can experiment with different colors and textures. You can even add fringe or beads for a more personalized touch.
- Loom Knit Hat⁚ Hats are another great beginner project. They’re a little more challenging than scarves, but still very doable. You can choose from a variety of patterns, from simple beanies to more elaborate designs.
These are just a few ideas to get you started. With a little practice, you’ll be able to create all sorts of amazing projects with your loom knitting skills.
Loom Knit Scarf
A loom knit scarf is a classic beginner project that’s easy to make and perfect for practicing your basic skills. You can choose from a variety of patterns, from simple garter stitch to more intricate designs. Here’s a basic pattern for a garter stitch scarf⁚
- Cast on⁚ Cast on the desired number of stitches for the width of your scarf. You can use any cast-on method you prefer.
- Knit rows⁚ Knit each row until you reach the desired length of your scarf.
- Bind off⁚ Bind off your stitches to secure the end of your scarf. There are many different bind-off methods, so choose one that you find easy to follow.
Once you’ve finished knitting your scarf, you can add fringe to the ends for a more finished look. You can also experiment with different yarn weights and colors to create unique and personalized scarves.
Loom Knit Hat
Loom knitting hats are a fun and rewarding project for beginners. They are relatively quick to make and require only basic stitches. Here’s a simple pattern for a basic loom knit hat⁚
- Cast on⁚ Cast on the desired number of stitches for the circumference of your hat. You can use any cast-on method you prefer.
- Knit rows⁚ Knit each row until you reach the desired length of your hat. You can use a stitch pattern of your choice, such as garter stitch, stockinette stitch, or a combination of both.
- Decrease⁚ When you reach the desired length, begin decreasing stitches by working two stitches together at regular intervals. This will create a crown for your hat.
- Bind off⁚ Once you have decreased all of your stitches, bind off the remaining stitches to secure the top of your hat.
You can customize your hat by adding a pom-pom, a brim, or a decorative stitch pattern. You can also experiment with different yarn weights and colors to create unique and personalized hats.
Tips and Tricks for Loom Knitting Beginners
Loom knitting can be a rewarding experience, but there are a few tips and tricks that can make it even more enjoyable for beginners. Here are a few suggestions⁚
- Practice your stitches⁚ Before you start a project, take some time to practice your knit and purl stitches. This will help you get comfortable with the movements and avoid mistakes later on.
- Use a loom hook⁚ A loom hook is a useful tool for making it easier to pull loops over other loops. It can also help you avoid snags and tangled yarn.
- Don’t be afraid to experiment⁚ Loom knitting is a very versatile craft. Experiment with different yarn weights, colors, and stitch patterns to find what you like best.
- Watch videos⁚ There are many helpful videos online that can teach you different loom knitting techniques and stitches.
- Join a loom knitting community⁚ Connect with other loom knitters online or in person. They can offer support, tips, and inspiration.
Remember, loom knitting is a journey, not a race. Enjoy the process and have fun!
Resources for Further Learning
Once you’ve mastered the basics of loom knitting, you’ll likely want to explore more advanced techniques and projects. There are a wealth of resources available to help you continue your loom knitting journey.
- Online Communities⁚ Join online forums, Facebook groups, and other social media communities dedicated to loom knitting. These spaces are filled with experienced knitters who are happy to share tips, patterns, and advice.
- YouTube Channels⁚ Many talented loom knitters create instructional videos on YouTube. Search for channels that cover specific techniques or projects you’re interested in.
- Books and Magazines⁚ There are several books and magazines dedicated to loom knitting, offering detailed instructions, patterns, and inspiration for a wide range of projects.
- Local Knitting Groups⁚ Check for local knitting groups or workshops in your area. These gatherings offer a chance to learn from experienced knitters and connect with other enthusiasts.
Remember, the world of loom knitting is full of possibilities. Don’t be afraid to explore, experiment, and let your creativity shine!